For this year’s secret santa I had to find a present for a friend of mine who plays the drums. So I decided to make him a drum and put the present in there. I wanted to try and make a drum that could actually be played.
I am not a good woodworker, and I have no idea how to make a round drum, so I came up with the idea of making an eight-sided drum. I figured that should be possible using the limited tools I have available.
The main tools I used were a jig saw, a cordless drill, an electric sander and a table saw. I could have done without the last two, but I don’t like manual sanding, and the angled rip cut was a lot easier with the table saw than it would have been with the jig saw. As for materials, except for the wooden plank, I had everything I needed lying around the my house (or shed).
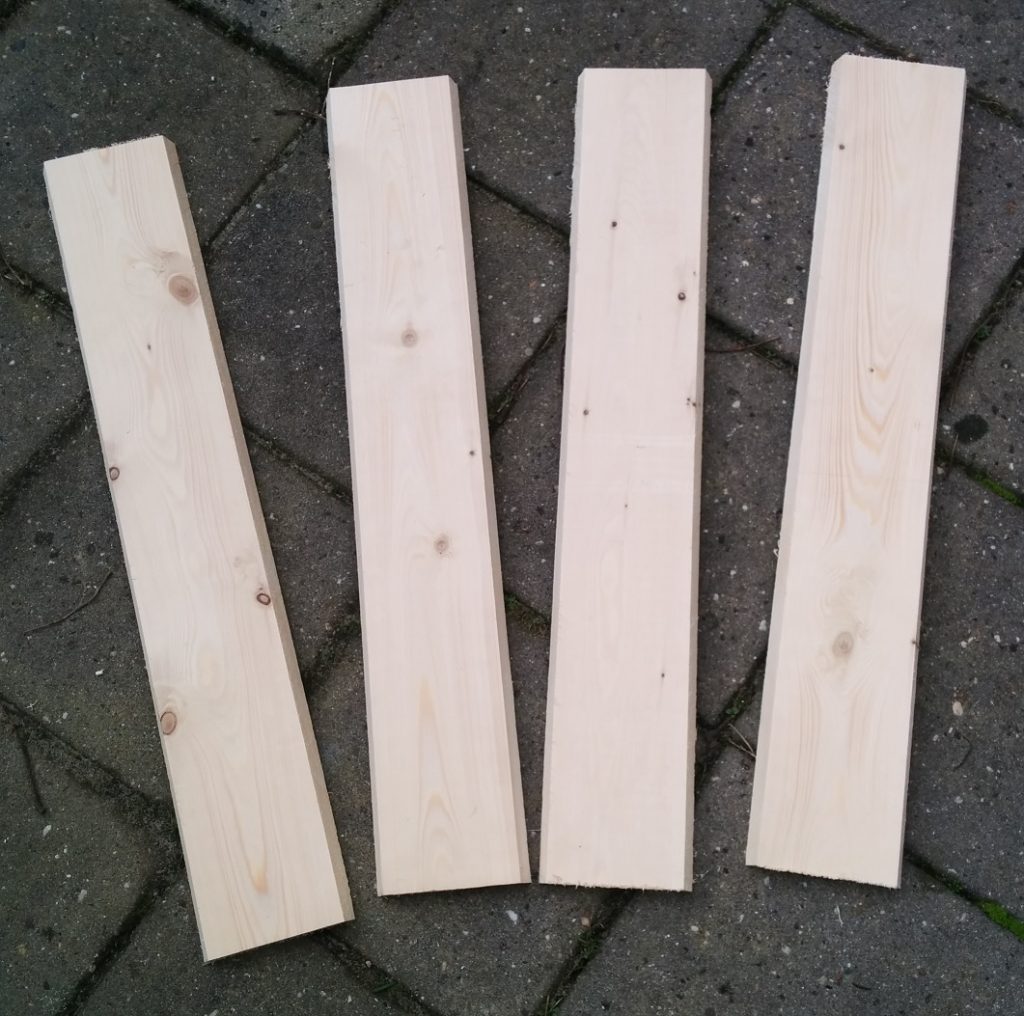
I started with a 300cm x 14.3cm x 1.8cm plank that I cut to 4 pieces of 70cm each. After that I used my table saw rip the plank to 12cm wide pieces that have a 22.5 degree angle on each side. The result looked like this:
I have a very cheap table saw and I knew it would not be accurate. So I tested the cut on a piece of scrap wood first. By cutting a piece of wood, flipping one half over and putting the angled sides together I should end up with a 135 degree angle on the inside or 225 degrees on the outside. This outside angle is easy to measure on a flat table (180 degrees) with a set square (45 degrees).
I actually had to set my table saw to 24 degrees to get a 22.5 degree cut. And in the end I should have gone a bit further: if the angle is off then the seams between the sides of the drum with not close entirely. With a larger angle the gap would have been on the inside of the drum, instead of the outside. In my case I was close enough to hide the small gap with some paint, but next time I will err on the safe side.
Now, I was going to make an eight-sided drum, why do I have only 4 pieces? That is because I wanted the drum not to sit flat on a floor or table. From what I read the sound has to have a way of getting out of the drum. So I wanted to give the drum feet to stand on, but giving all the 8 sides the same shape was a bit of a problem. The easiest way that I could think of to get a consistent shape on all sides of the drum was to use my 2.5cm drill bit first and then cut them in half, making the 8 sides of the drum from these 4 pieces. So first I drilled the holes:
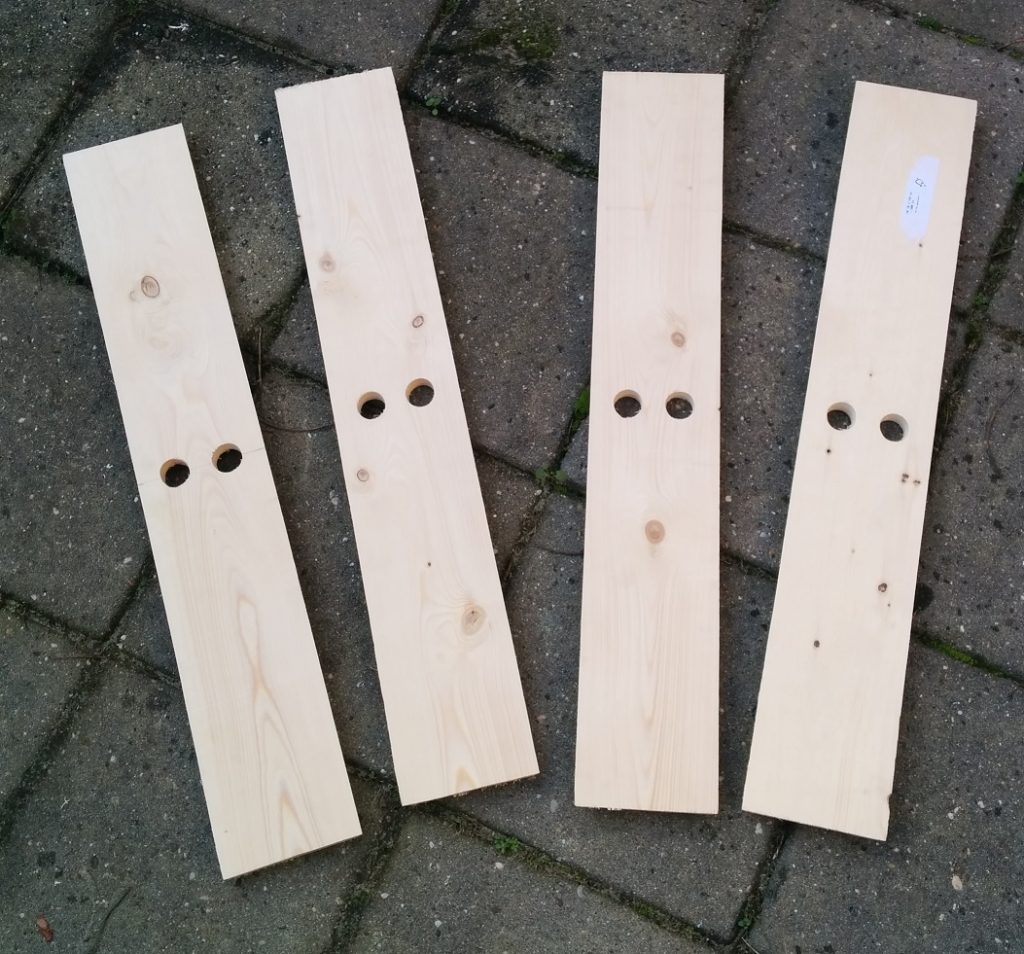
That took a while, since my cordless drill had to recharge several times in between (also I cut extra holes in a jig to ensure that the holes would be at the same spot on each of the boards).
After that I cut the boards in half. Note that I knew I would not be able to drill the holes dead-center in each of the boards, but by using a jig I ensured that they would all be in the same position. So I now have 4 boards that have a slightly smaller part of the 2.5cm hole than the other 4 boards. This is okay, by keeping track of this I can ensure that we get an alternating pattern of large and small holes when I glue the drum together. This is the result:
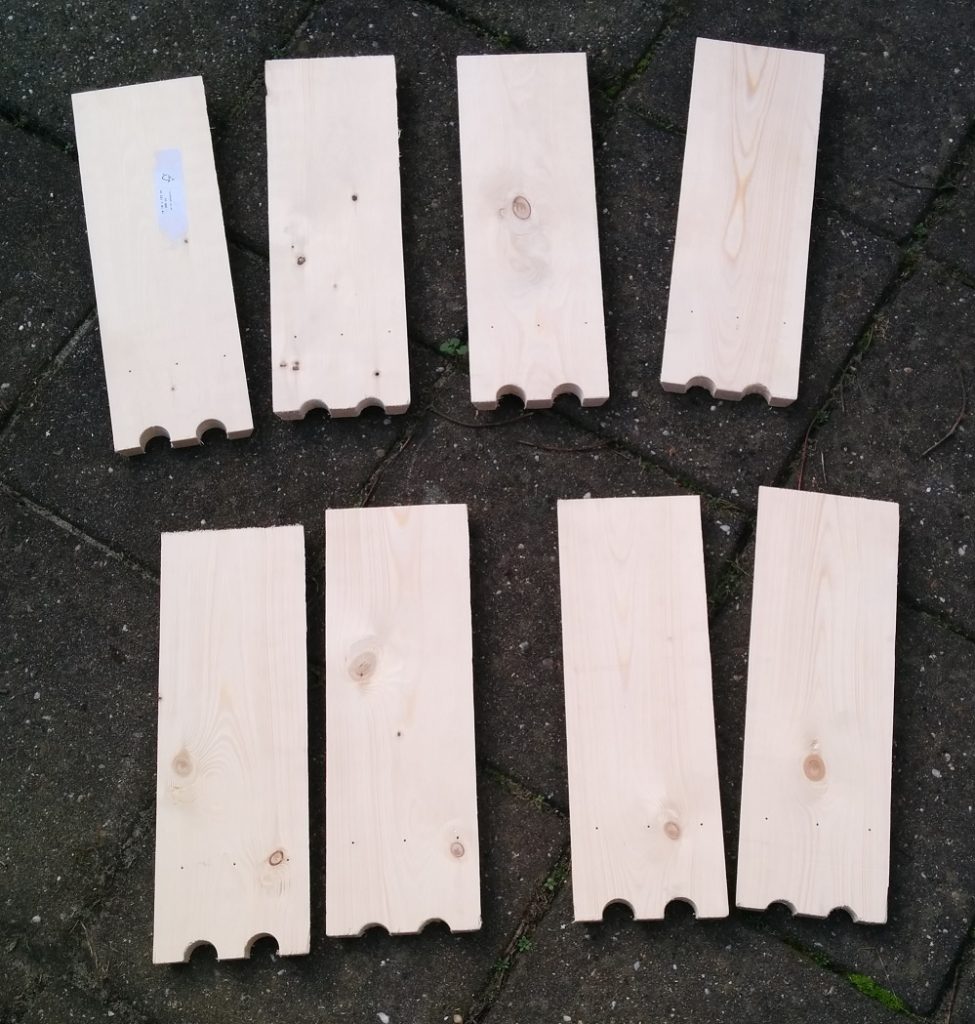
I also pre-drilled 3 small holes in each board. These will later hold the screws to which I will attach the thread that tightens the drum skin.
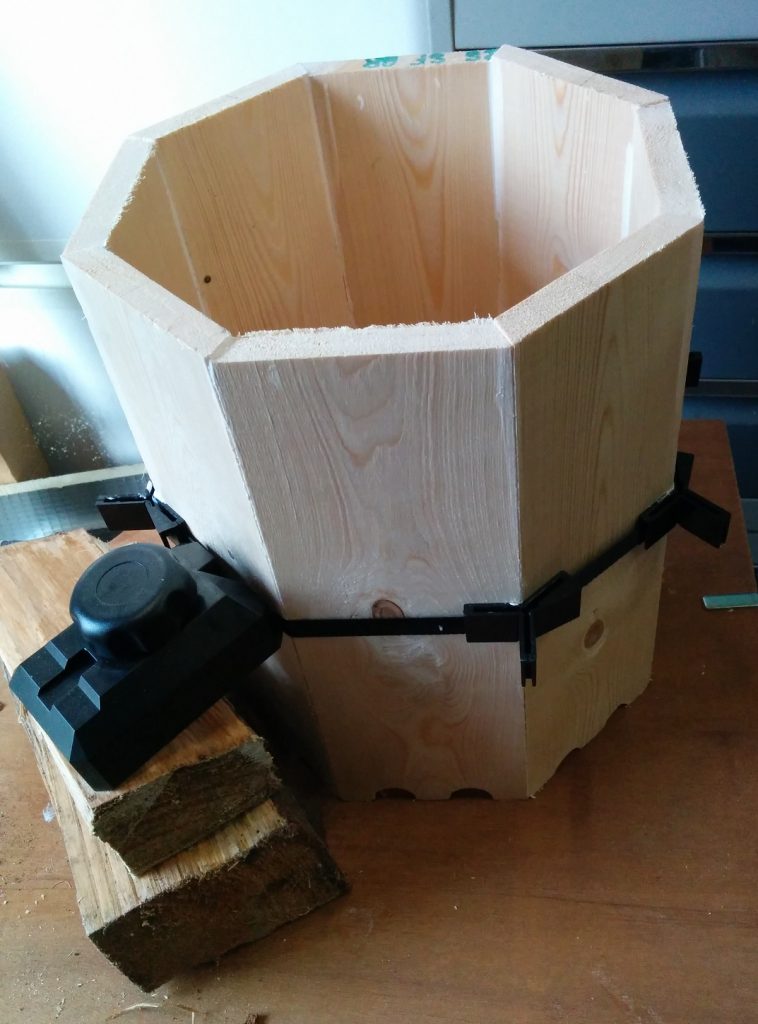
After that it is just a matter of glueing the boards together using wood glue. To hold everything in place while the glue dried I used a band clamp (“lijstklem”). I would have liked to use two (one at the top and one at the bottom), but I only have one.
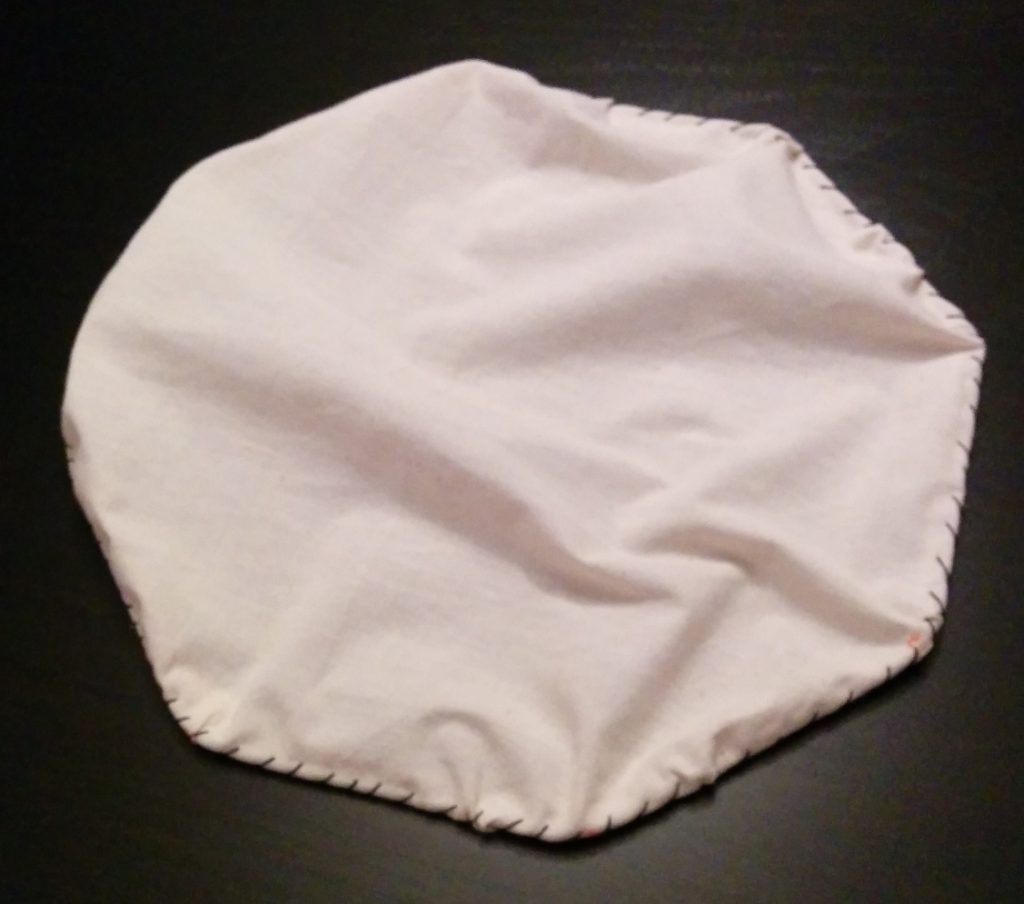
While the glue was drying I worked on the drum head. I wrapped a piece of brown electrical wire around the wooden drum, and then cut a piece of cloth that was slightly larger.
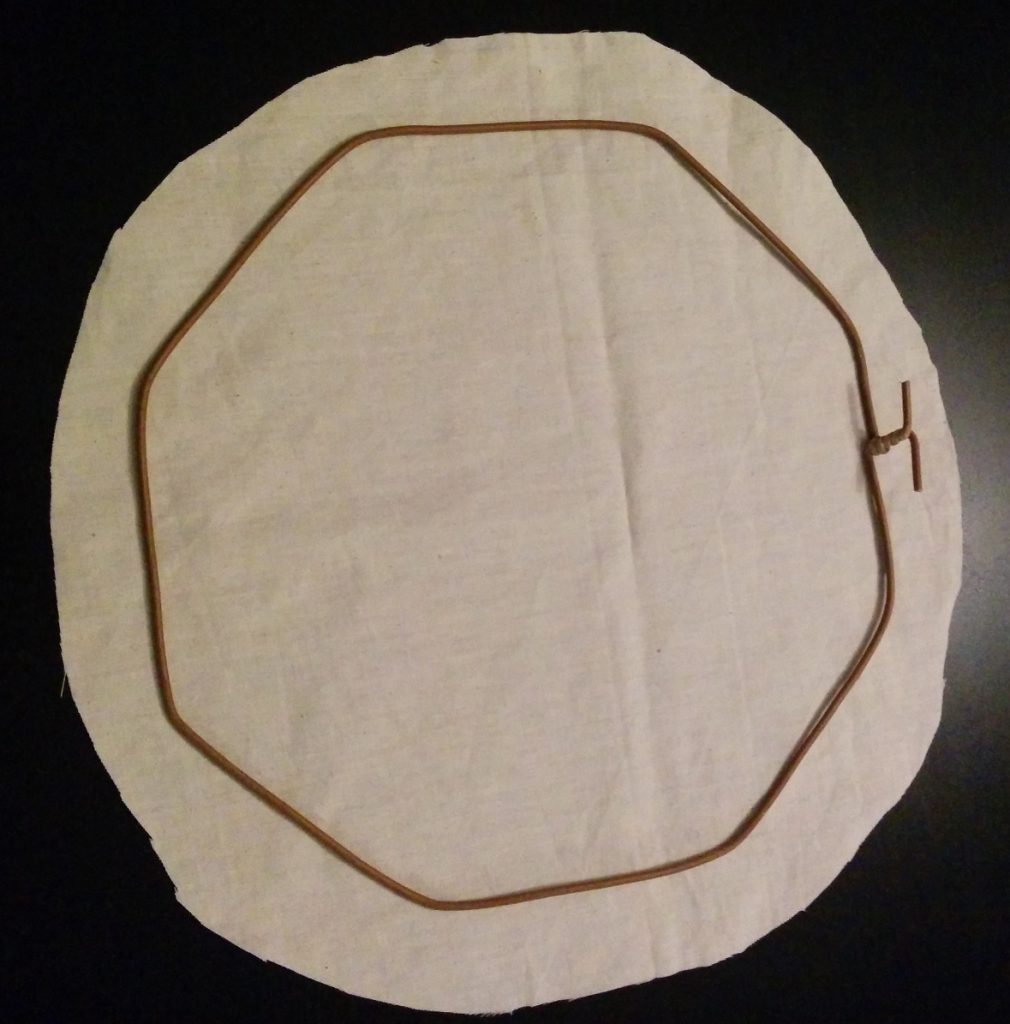
The cloth is ordinary canvas from a bag that I once got. It was the only material I had lying around that had the proper color and it seemed strong enough.
So, after a bit of sewing I had the cloth attached to the electrical wire:
In the meanwhile, the glue had dried, and I proceeded to sand the whole drum. Especially the sharp edges at the top, because these would be in contact with the drum head.

Then, of course, painting. Everytime you see a drum in a drawing it is red, so I wanted my drum to be red as well.
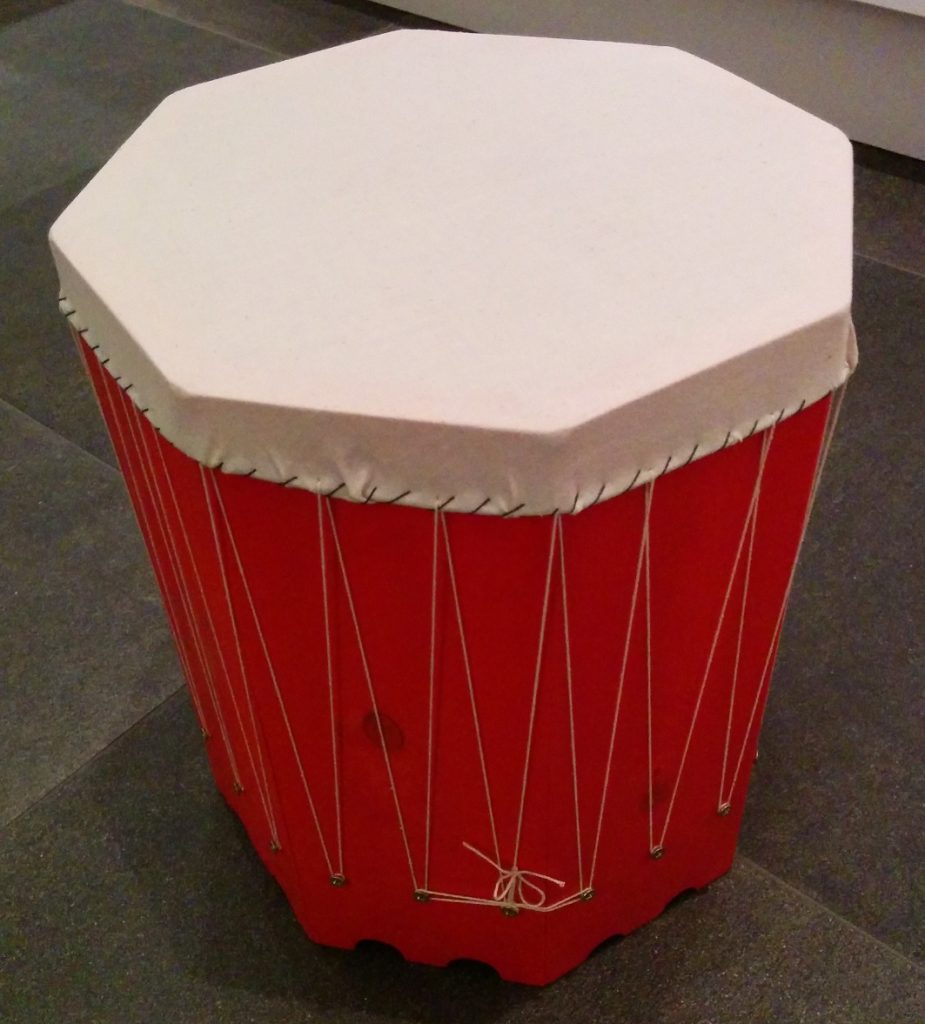
I then screwed some brass screws in the pre-drilled holes and started attaching the drum head.
I did not put the drum head around the drum immediately. I left it loosely on top so I could easily add another thread (rope actually) between the screws and the drum head with a thick needle.
Once that was done I could start to slowly tighten this rope until the drum head was taut. It was a bit finicky but eventually I got it done. I tightened the rope a bit more each day over the course of three days. The drum sounded pretty OK, but I was worried that the cloth I used was stretching a little bit each day and that if I kept tightening it, it would rip before I could give it as a present.
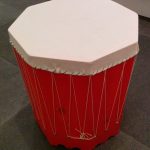
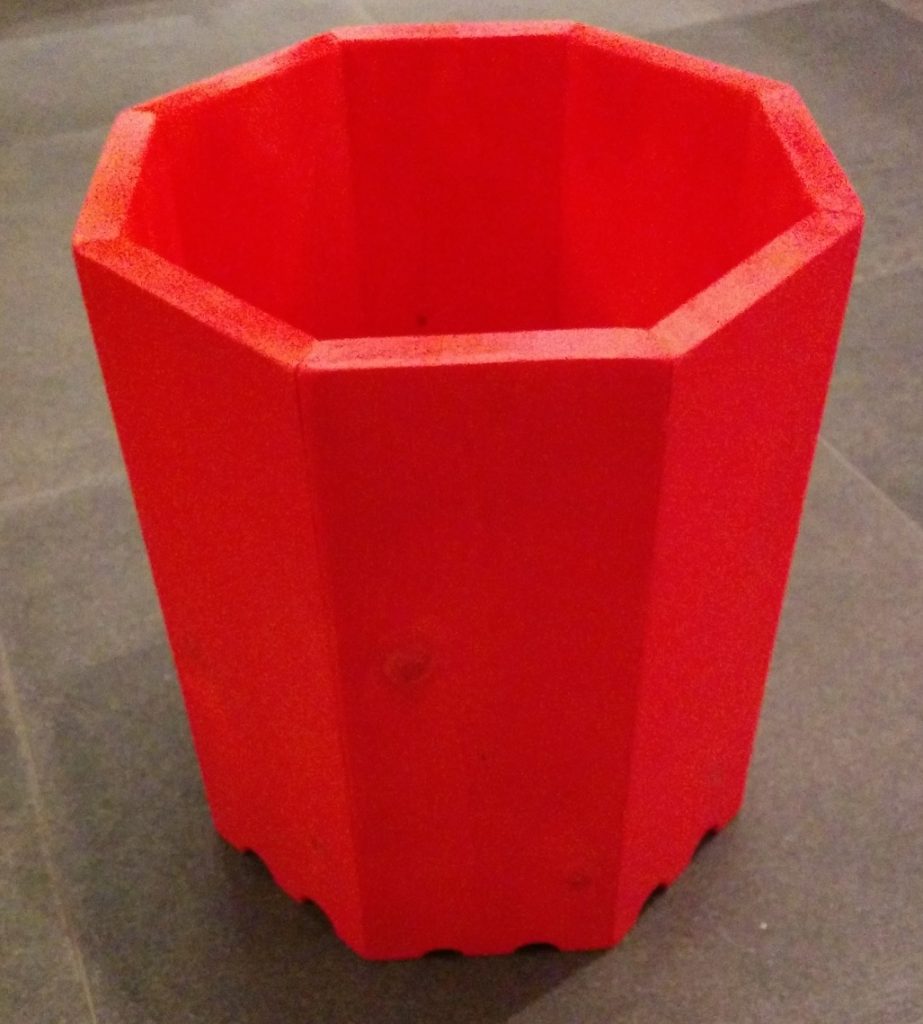
So, this was the end result:
It sounds pretty OK when the head is tightened: